background

welcome to Cherries and Figs- adventures in the kitchen. It's my place for jotting down food thoughts, delicious recipes, and all things culinary. So, sit down, get comfy and join me in my kitchen....

Thursday, March 15, 2012

Freezer Dinners


You know those nights when you're too tired to put together a delicious meal after a long day of errands, shopping or work? At that moment you just want to head out to a restaurant because it's so much easier than spending the next hour cooking but don't- instead I've got the solution that'll save you effort, time and cost- freezer dinners!
Freezer dinners are meals you put together on your free time, and then assemble and freeze until you need them. The night before, you take one out and defrost in the refrigerator and cook as directed. In no time you've got a delicious, healthy and simple meal with very little effort except grilling, baking or roasting in the oven. Today I managed to whip up 5 dinners in 45 minutes that will be ready for use in the next couple of weeks. I'll share two of my easy recipes below and in upcoming weeks I'll share more. Hopefully these will work out for your family as well as they do with mine :)

Fish with Mustard Nut Crust (serves 4 from A Decade of Cooking The Costco Way)
3 Tbsp. butter
1/4 cup whole grain mustard
1/2 cup chopped nuts (I used almonds, but you could use hazelnuts or pine nuts as well)
4 fish fillets (I use tilapia but any white fish is great)
salt, cayenne pepper
3 tbsp. chopped fresh thyme
1/2 cup white wine

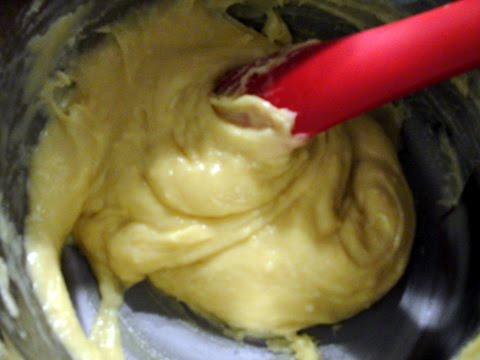
In a food processor, mix nuts, mustard, and butter until resembles a coarse paste. Set aside.
Lay 4 fish fillets in a freezable and oven proof container, sprinkle with salt and cayenne pepper to taste. Spread nut butter over fish in an even layer and sprinkle with thyme. Pour wine around fish, cover tightly and freeze with the following instructions: Day of cooking- preheat oven to 500 degrees. Bake, uncovered for 10-15 minutes or until the fish is flakey and the crust is bubbly. Serve immediately.


Honey and Mustard Glazed Sausages (serves 4)
5-6 uncooked italian sausages (mild, medium or hot)
1/4 c. whole grain mustard
1/4 c. honey
salt, pepper to taste
1-2 tbsp. chopped parsley

place uncooked italian sausages in a freezer safe and oven proof container. Meanwhile, mix the honey, salt and pepper in a small bowl and pour over sausages. Sprinkle with a little chopped parsley, cover and freeze with the following instructions: Day of cooking- preheat and then roast sausages at 400 degrees for 20-30 minutes or until sausages are cooked through. Halfway through cooking, turn sausages over once to glaze on bottom side. Serve immediately and enjoy

Wednesday, April 13, 2011

Banoffee Mess


Banoffee Mess- what the heck is this? It's a banana-toffee pie! The other day I was looking in my pantry and saw the two cans of sweetened condensed milk that I accidentally bought (I needed evaporated milk) and have been sitting on the shelf for months. I was at a loss for what to do with them since I don't usually make recipes that call for the stuff. Yesterday I was watching foodnetwork and 5 Ingredient Fix came on after my favorite cooking show. I was getting ready to turn off the TV when I heard the host say "banoffee mess". I tuned in and heard "sweetened condensed milk" and was immediately interested in finding out more. Well, who knew you could make toffee from a simple can of milk and boiling water?? Certainly not me. Turns out that this recipe uses only 5 ingredients and by simmering an unopened can of sweetened condensed milk for 3 hours, it magically transforms into a sweet, rich toffee that tastes just like Dulce leche! Yeah, score!

I checked in my pantry and found I had all the ingredients except the carton of whipping cream so I started baking and boiling. Chris picked up the whipping cream on his way home from work and we devoured this pie for dessert. A definite winner, and the best part? The thick, rich, sweet toffee made from my accidental purchase! ;)

Banoffee Mess (serves 6-8)
1 (14 oz) can of sweetened condensed milk
2 cups graham cracker crumbs (about a package and half of graham crackers)
1 stick butter, melted
4 bananas, sliced
2 cups heavy whipping cream

In a saucepan, cover an unopened can of sweetened condensed milk with water. Bring to a boil and simmer for 3 hours, adding water as necessary to keep the can submerged in the water.
Heat the oven to 375 degrees. Mix the graham cracker crumbs and melted butter in a small bowl. Press the mixture into a 9 inch pie plate. Bake for 12-15 minutes, then cool completely and set aside until ready to assemble the pie.
Remove the condensed milk from heat and let cool enough to be able to remove the can from the water. let cool for at least 15 minutes before opening the now dark and creamy toffee. Thinly slice the bananas and evenly arrange 1 layer of bananas over the graham cracker crust. Pour the toffee over the top and spread evenly. Put another layer of bananas on top of the toffee. Whip the 2 cups of whipping cream in a large bowl until soft peaks form, and spoon it on top of the bananas, spreading out to make an even layer. Add a few bananas on top for decoration. Refrigerate the pie for at least 2 hours before serving and enjoy!

Saturday, April 9, 2011

Creamy Lemony Eggs with Prosciutto


Want a knockout dish for brunch this weekend? Something out of the ordinary, but comforting, rich and just 6 ingredients? Creamy, Lemony eggs with Prosciutto is the perfect recipe to start the weekend off right.
I've recently bought the cookbook, Radically Simple by Rozanne Gold because I wanted to add recipes to my repertoire that were simple to make but didn't sacrifice on the wow factor or flavor. This cookbook and recipe has become one of my staples- my family requests several recipes from Rozanne's collection, and I have made the creamy lemony eggs with prosciutto for several friends and received wonderful reviews. The ingredients are simple, just eggs, lemon, prosciutto, butter, English muffins and chives. The original recipe doesn't call for English muffins but I stack everything on top of the toasted bread and I think it adds that je ne sais quoi. Sound too simple to impress? Not so. The difference is in the way the eggs are cooked. Instead of pan frying the eggs, you ever so gently cook them in a double boiler just like hollandaise, and the result? Pure perfection. The creamiest eggs you've ever had with a hint of lemon. People will swear you've added tons of cheese and cream because of the texture. The eggs are super creamy and luscious. Simply delicious! If you don't have a double boiler, don't let that scare you off. The truth is, I don't have one either. You can make an easy version by placing a heatproof bowl (I used a big glass bowl) over a big pot of gently boiling water.

Just take care not to have the bottom of the bowl touch the hot water. One word of advice- take your time with the eggs, baby them. Trust me, in the end it will be so worth it. Bon Appetit!

Creamy Lemony Eggs with Prosciutto serves 4
6 oz. thinly sliced prosciutto
6 extra-large eggs plus 3 egg whites
grated zest and juice of 1 lemon
2 Tbsp. unsalted butter, melted
3 Tbsp. of chopped fresh chives
4 English muffins, split and toasted

Line the centers of the plates with the toasted English muffins. Place prosciutto on top of the muffins, overlapping the slices. Set aside.
Combine the eggs and whites and beat with a whisk until thoroughly mixed. Add the lemon zest, melted butter, juice of the lemon and salt and pepper to taste. Mix well.
Bring several inches of water to boil in the bottom of a double boiler. Reduce heat to a rolling simmer. Add your egg mixture to the top of the double boiler. Cook, stirring constantly with a rubber spatula, until the eggs have thickened into small curds, about 10-15 minutes. Spoon the hot eggs onto the prosciutto and English muffins. Garnish with chives.

*note: I have changed Roxanne's original recipe- my changes are included. I have also made these eggs substituting thinly sliced lox when I didn't have prosciutto on hand. Both work equally well with the lemony creamy eggs. Here's a photo of the salmon version

Tuesday, March 29, 2011

Crispy Kale Chips


Crispy kale chips are satisfyingly crunchy, slightly salty, and oh so addictive. No, that's not a typo- I am talking about kale, that dark green, leafy and sometimes a tad bit bitter vegetable that makes some people run away screaming from their plates.
Kale is in the same family as brussel sprouts, cabbage, collard greens, cauliflower and broccoli and also contains powerful antioxidant properties- a super food, if you will. It's a vegetable that's very high in beta carotene, vitamin K, vitamin C, lutein, zeaxanthin, and calcium. Just eating kale makes me feel virtuous and healthy. As with most moms out there, I'm always trying to find interesting and delicious ways to prepare foods that are not only healthy, but also in a way that is enjoyed by my family. This recipe fits both requirements nicely. Not only are my girls eating kale, but they're loving it, requesting this recipe and eating two heads of kale in a sitting! My youngest daughter helped to make our kale chips almost completely by herself. Include your 'little helpers' in choosing their kale from the market, chopping (with assistance if necessary), and making their chips and I'm pretty sure they'll eat it up too!

Crispy Kale Chips
Preheat oven to 350 degrees
Wash and dry kale leaves

chop kale into bite size pieces

For each head of kale, drizzle with 1-2 tbsp of extra virgin olive oil and sprinkle with salt, pepper to taste. Gently mix with your hands, making sure pieces are seasoned and oiled

spread onto a baking sheet in a flat, even layer

pop into hot oven and 'roast' for about 20-25 minutes, until crisp and dark green

enjoy! :)

*For flavor additions, you could add a sprinkle of garlic or onion powder, chili or ground cumin. Experiment and have fun with your kale!

Thursday, February 3, 2011

Inspired Chinese Chicken Salad

Happy Chinese New Year! :) To celebrate, I'm sharing a recipe that Chris and I are currently obsessed with. We've made it for our lunch two days in a row and eaten every single bit from the salad bowl. It's an inspired Chinese Chicken Salad that I found in Food and Wine magazine. Fresh, crunchy, delicious and fast- this is one recipe you'll want to share too! Kung Hei Fat Choi- Happy 2011 year of the rabbit :)


Chinese Chicken Salad (serves 2-3)
1/4 c. mayonnaise
1/4 c. plus 2 Tbsp. unseasoned rice vinegar
3 Tbsp. plus 1 1/2 tsp. sugar
1/4 c. light soy sauce
2 tbsp. toasted sesame oil
2 tsp. Tabasco
one 1/2 inch piece of ginger, peeled and minced or 1 tsp. ground ginger
1 small garlic clove, minced or 1/2 tsp. garlic powder
1-2 cooked chicken breasts, shredded (I use a rotisserie chicken)
3 stalks green onion, chopped
2 celery ribs, thinly sliced
1/2 c. unsalted roasted peanuts, coarsely chopped
1/4 c. chopped cilantro
one small head of romaine, cut into 1/2 inch ribbons
1/2 head of Napa cabbage, thinly sliced
lime wedges for serving

In a bowl, whisk the mayonnaise with the vinegar, sugar, soy sauce, sesame oil, Tabasco, ginger and garlic.
In another large bowl, toss the lettuce, green onion, celery, cabbage, shredded chicken, peanuts, and cilantro. Add the dressing to coat (don't worry, you will have left over dressing for tomorrow! hahaahaa) and toss all together. Serve and eat immediately

Thursday, January 27, 2011

Crazy For Cocoa Puffs!!


Cocoa Puffs! A cereal you go kookoo for? Nope. If you've ever lived on or visited Oahu you'll know exactly what I'm talking about. There's a bakery that's famous for their Cocoa Puffs, and I hear they now make a green tea version and sugar free version of the original dessert as well. Liliha Bakery on 515 North Kuakini Street makes a pastry that's so ono (delicious) my daughter Sophie and I dream about it! In fact, when she had her birthday party she requested a batch of cocoa puffs in lieu of the traditional birthday cake! Made with a classic choux pastry (think eclair and cream puffs), a chocolaty filling and topped off with a chantilly frosting that's so creamy and sweet you'll be dreaming about it too! If you're like me and can't make a drive to the bakery but have a cocoa puff craving, I've got the remedy. Try it and see why this posting is littered with exclamations!

Cocoa Puffs (makes approximately 22-26)
cocoa puff shell:
1/2 c. butter
1 c. water
1 c. flour
4 eggs
Preheat oven to 400 degrees. combine water and butter and bring to a boil and remove from heat. Add flour and mix vigorously until dough ball is formed. Let dough rest for at least 10 minutes to allow it to cool down. After resting, mix in eggs, one a t a time until all eggs are well Incorporated.
Let rest in refrigerator for 30 minutes. Make tablespoon sized ball and bake on a parchment paper lined sheet pan for 35-40 minutes or until lightly golden brown and puffed. Let cool on rack before filling.
Filling:2 small boxes instant chocolate pudding
2 c. cold milk
mix the boxes of pudding with cold milk. Filling will be thick. Store in refrigerator.
Chantilly Frosting:
12 oz. can unsweetened evaporated milk
1 1/2 c. sugar
3/4 c. melted butter
4 large egg yolks
1 1/2 tsp. vanilla
Combine all ingredients in a med. saucepan. While stirring constantly, slowly rise heat on stove over the course of half and hour. Be sure not to heat mixture too fast or stir to slow because you could end up with scrambled eggs. Cook until thick and will coat spoon. Let cool in refrigerator till ready to use.

Cut open puffs and spoon chocolate filling inside or use pastry bag to fill shells. Frost tops like a cupcake with chantilly. Store in airtight container in refrigerator until ready to serve.

*Mahalo to Da Birds and Da Freedland's for the recipe!!*

Sunday, January 23, 2011

Szechwan Style Shrimp Stir-Fry


This week I've been trying to cut back on calories and fat without sacrificing good taste. I want a recipe that's easy to execute and quick to cook. Hmmm... low fat, low calorie, quick, easy and delicious- sound impossible? Not so with this meal. Try it and you won't be dissapointed. You may even re-think ordering Chinese take out next time

Szechwan Style Shrimp (serves 4)
1 1/4 lb. fresh medium sized shrimp
4 tsp. reduced- sodium soy sauce
4 tsp. grated fresh ginger or 3/4 tsp. ground ginger
1 Tbsp. sherry or water
1 tsp. cornstarch
2 tsp. toasted sesame oil
1 Tbsp. chili sauce with garlic (Mae Ploy or similar)
salt, pepper to taste

1 1/2 tsp. reduced soduim soy sauce
1/2 tsp. cornstarch
4 tsp. canola oil
4 cloves garlic, thinly sliced
1 pkg fresh mushrooms, sliced
1 red bell pepper, cut into strips
2 c. fresh pea pods or snow peas
1/2 head Napa cabbage, shredded
1/4 c. cashews
3 Tbsp. sliced green onion

Peel and devein shrimp. Rinse shrimp, pat dry with paper towels. For sauce, in a small bowl combine the 4 tsp. soy sauce, ginger, sherry, chili sauce, 1 tsp. cornstarch, sesame oil and salt/pepper. Set aside.
Place shrimp in med. size bowl and season with salt and pepper. Stir in 1 1/2 tsp. soy sauce and 1/2 tsp. corn starch. Set aside.
In a wok or 12 inch skillet, heat 2 tsp of the canola oil over med-high heat. Add garlic and stir-fry for 30 seconds. Add mushrooms and stir fry for 3 minutes. Add bell pepper, and stir fry for 2 minutes. Add peas and stir fry for 2 minutes. Remove ingredients from wok.
Add remaining 2 tsp. canola oil to wok. Add shrimp mixture, stir fry for 2-3 minutes or until shrimp turn opaque. Stir sauce and add to wok. Cook and stir until boiling. Add mushroom mixture and chinese cabbage. Toss to coat.
To serve, sprinkle with chopped cashews and green onions